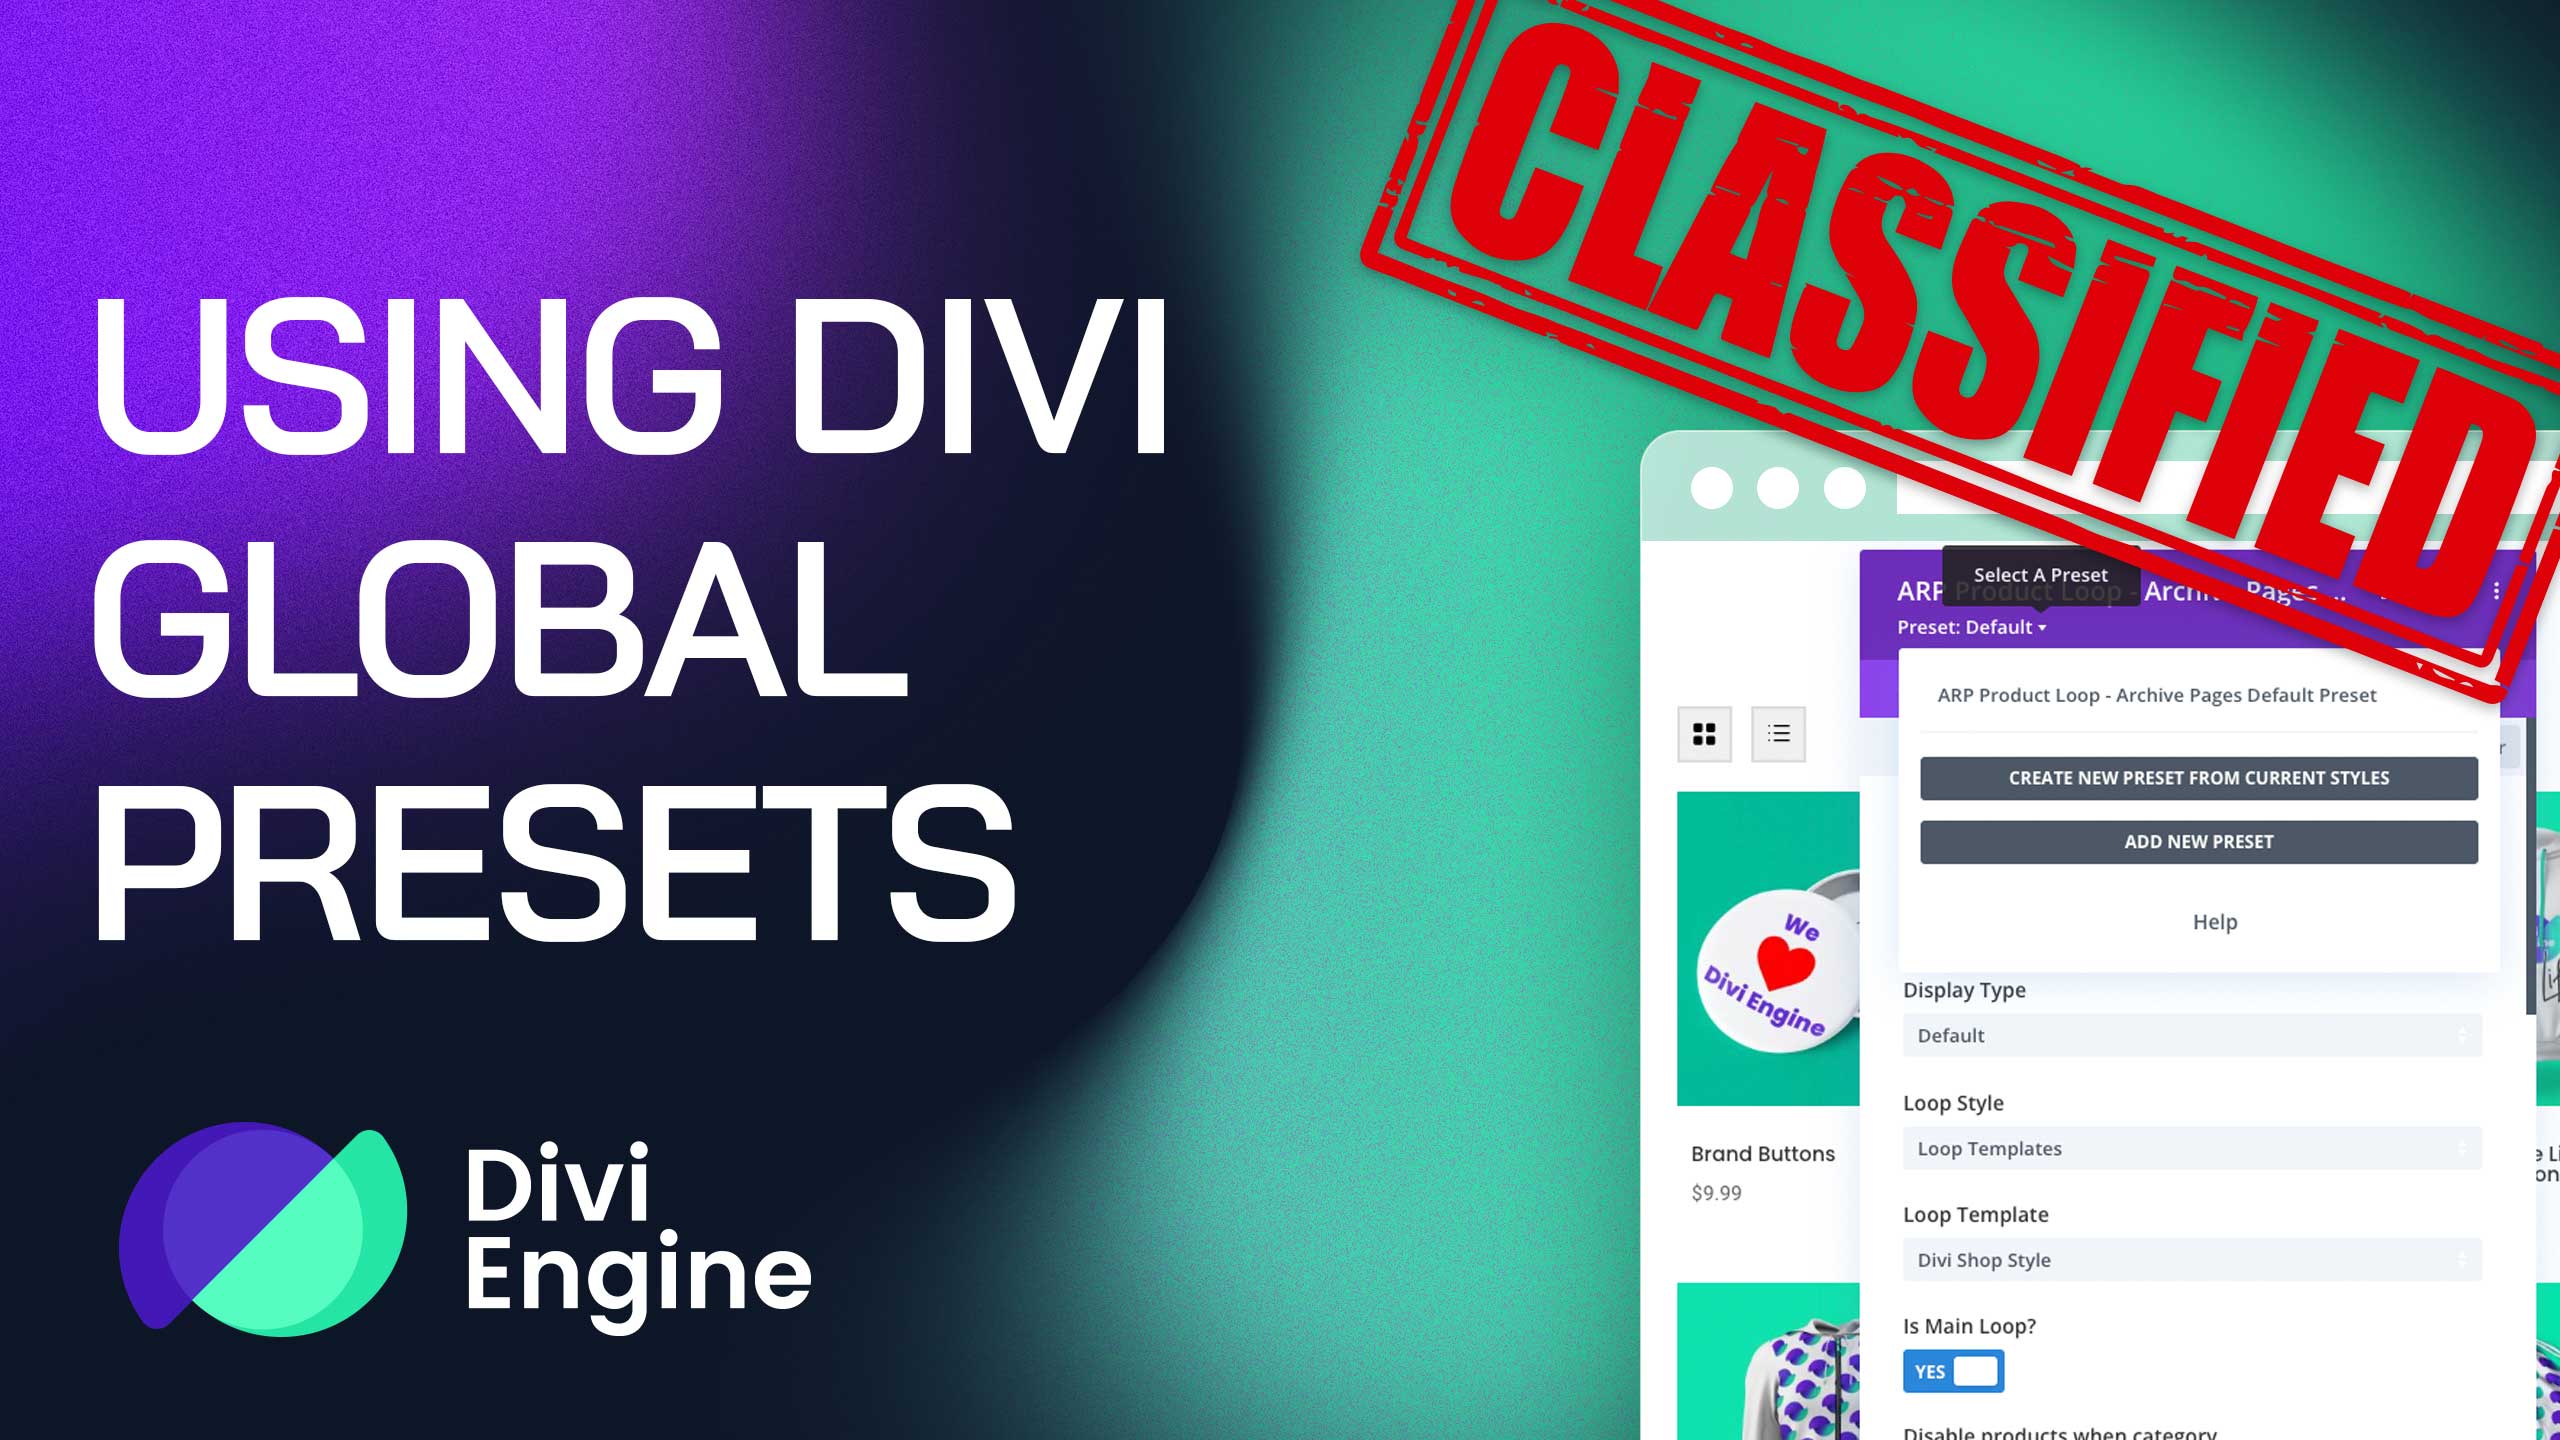
Divi comes with a standard set of defaults for its modules, rows, and sections. However, as you delve into the design and customization of your website, the necessity to tweak these defaults often arises, particularly when adhering to a uniform design language across your site. While Divi’s extend feature is a handy tool, it has its limitations: its scope is confined to a single page, and any subsequent changes require a rerun through the extend steps.
This is where Divi Presets come into play, offering a more streamlined approach to managing your styling changes. You have the option to create either a Global Preset or a new preset, which can be assigned wherever needed. The advantages of Divi Presets are multifold:
- Global Presets: These are your go-to for site-wide consistency. Any style adjustments made in a Global Preset are reflected across your entire website built with Divi Builder.
- New Presets: Crafted for special styling needs, new presets can be created and used anywhere on your site.
- Easy Edits: No need to navigate away; simply open the settings of any module, row, or section using the preset you wish to amend, and your changes will be applied universally to all Divi elements using that preset.
- New Defaults: Presets act as your new starting point for customization. Further tweaks made while using a preset will not affect other elements using the same preset.
- Style Application: Apply additional styles to the active preset effortlessly without having to reopen the preset editor.
Editing the Default Presets
Tweak the default styles of Divi for a module, row, or section by following these steps:
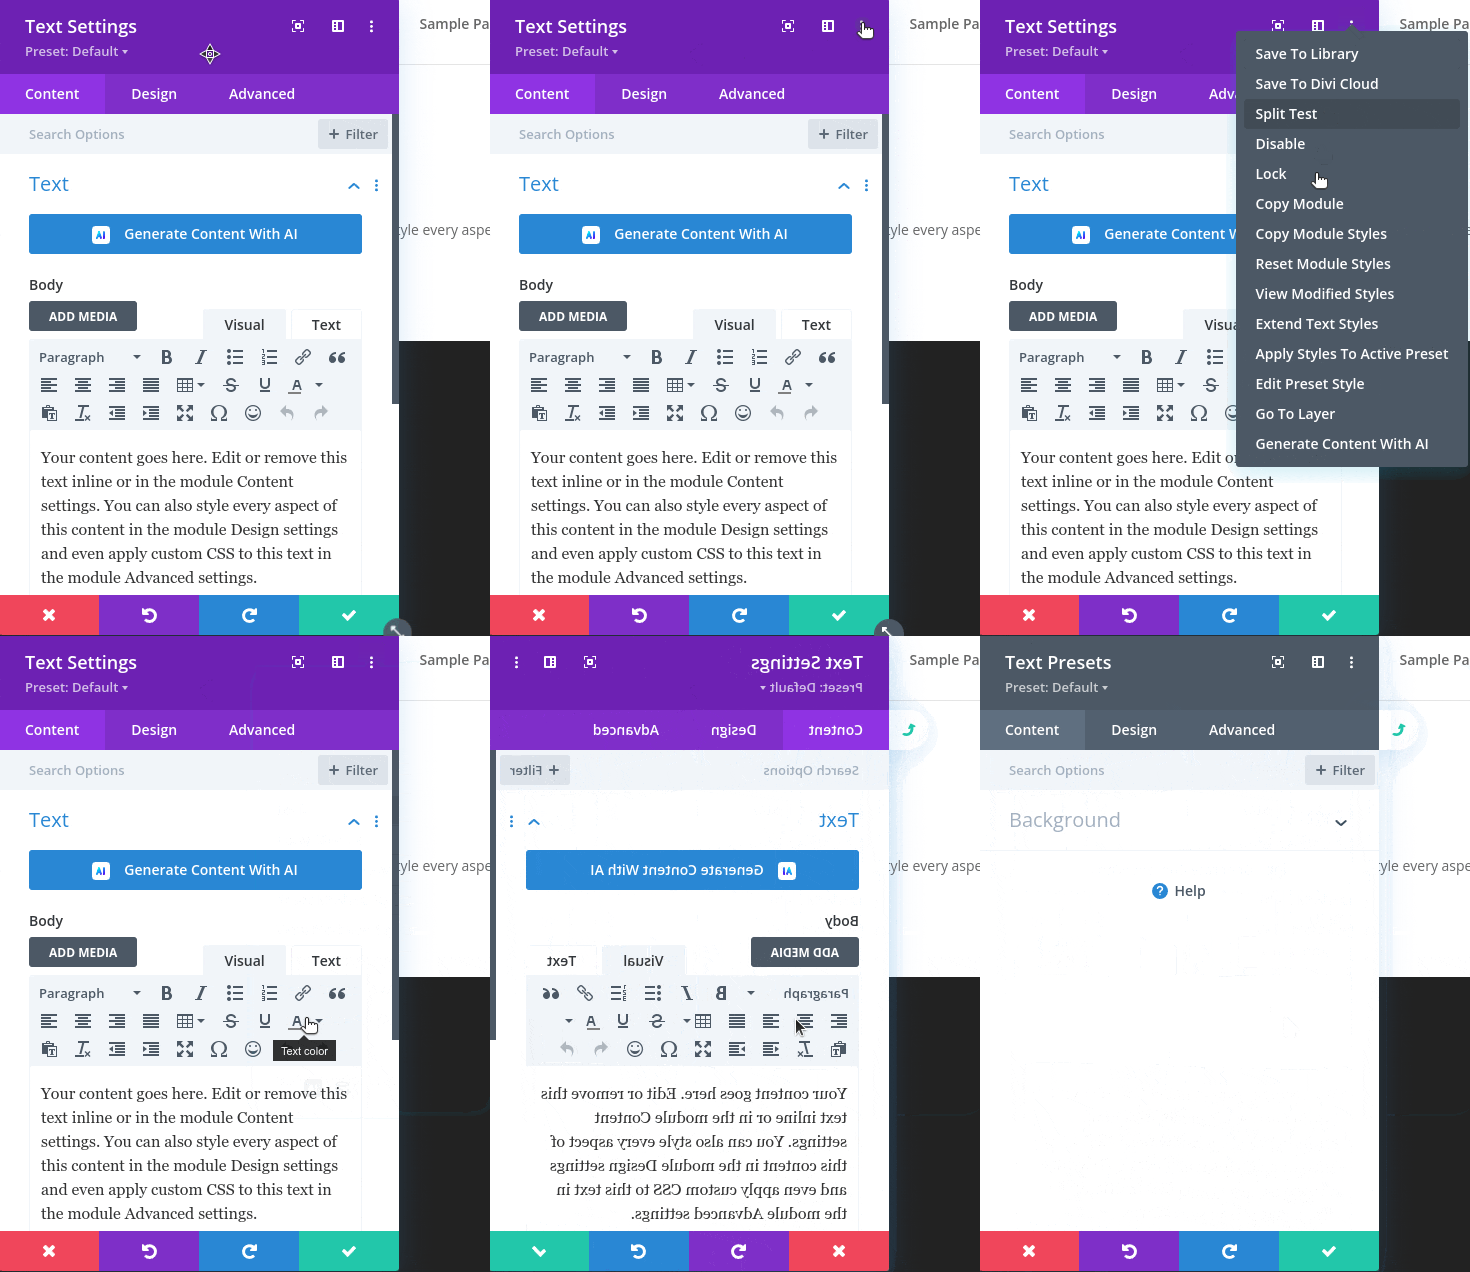
- Open the settings for the
Module,Row, orSectionand click on the three vertical dots located at the top right corner of the settings window. - Click
Edit Preset Style.

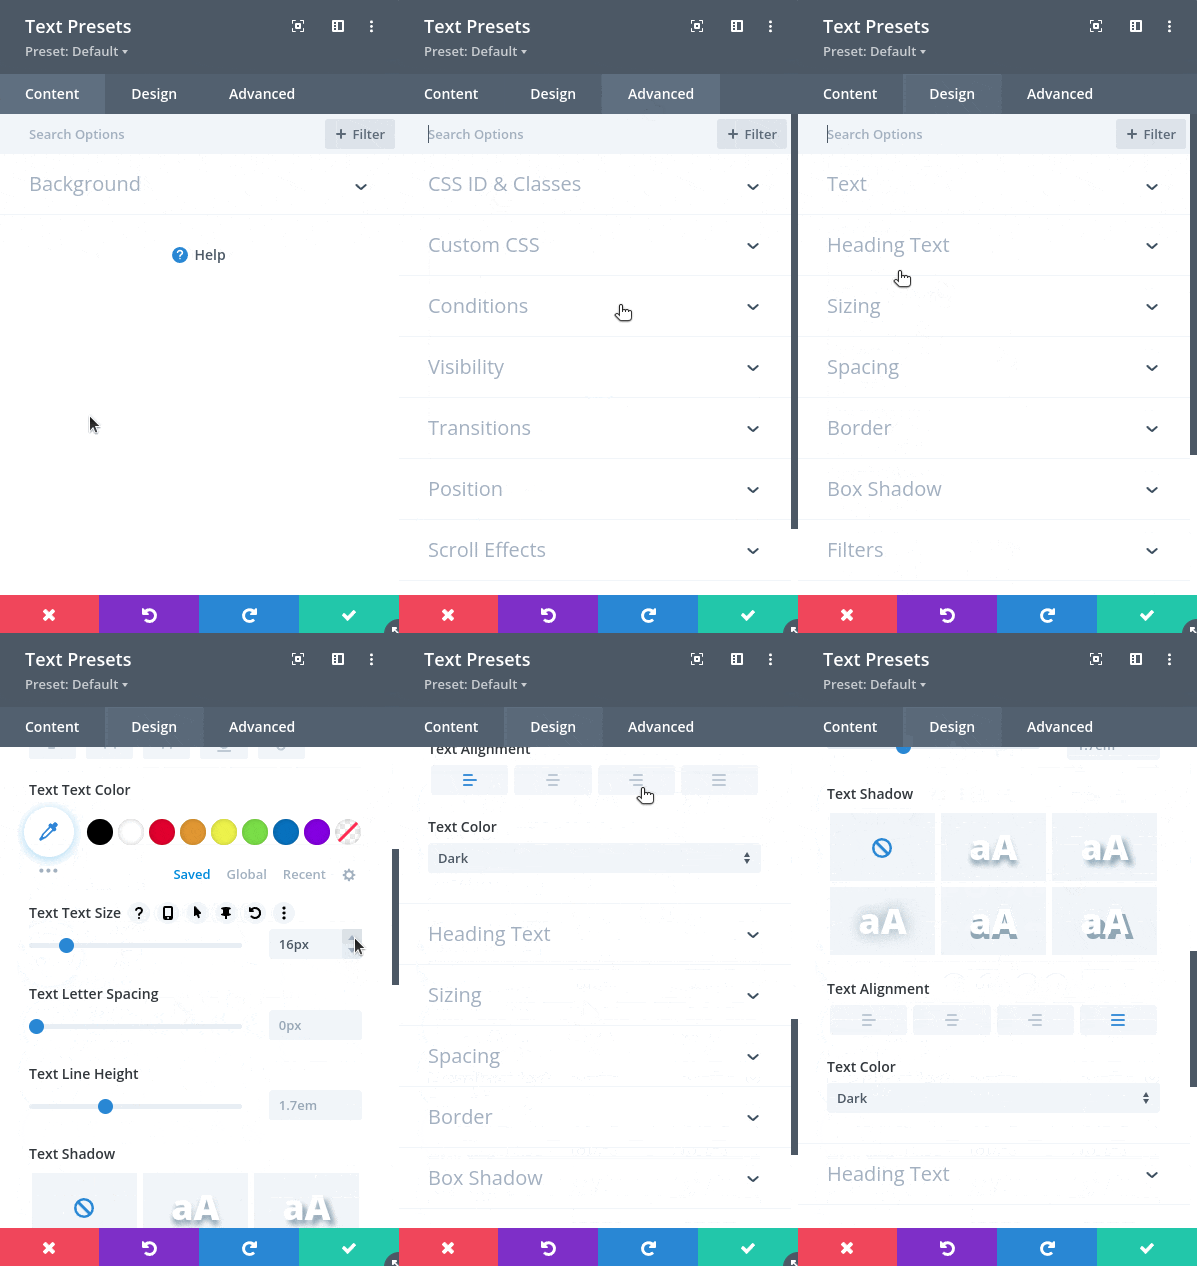
- Navigate through the
Content,Design, andAdvancedtabs to make your desired changes.

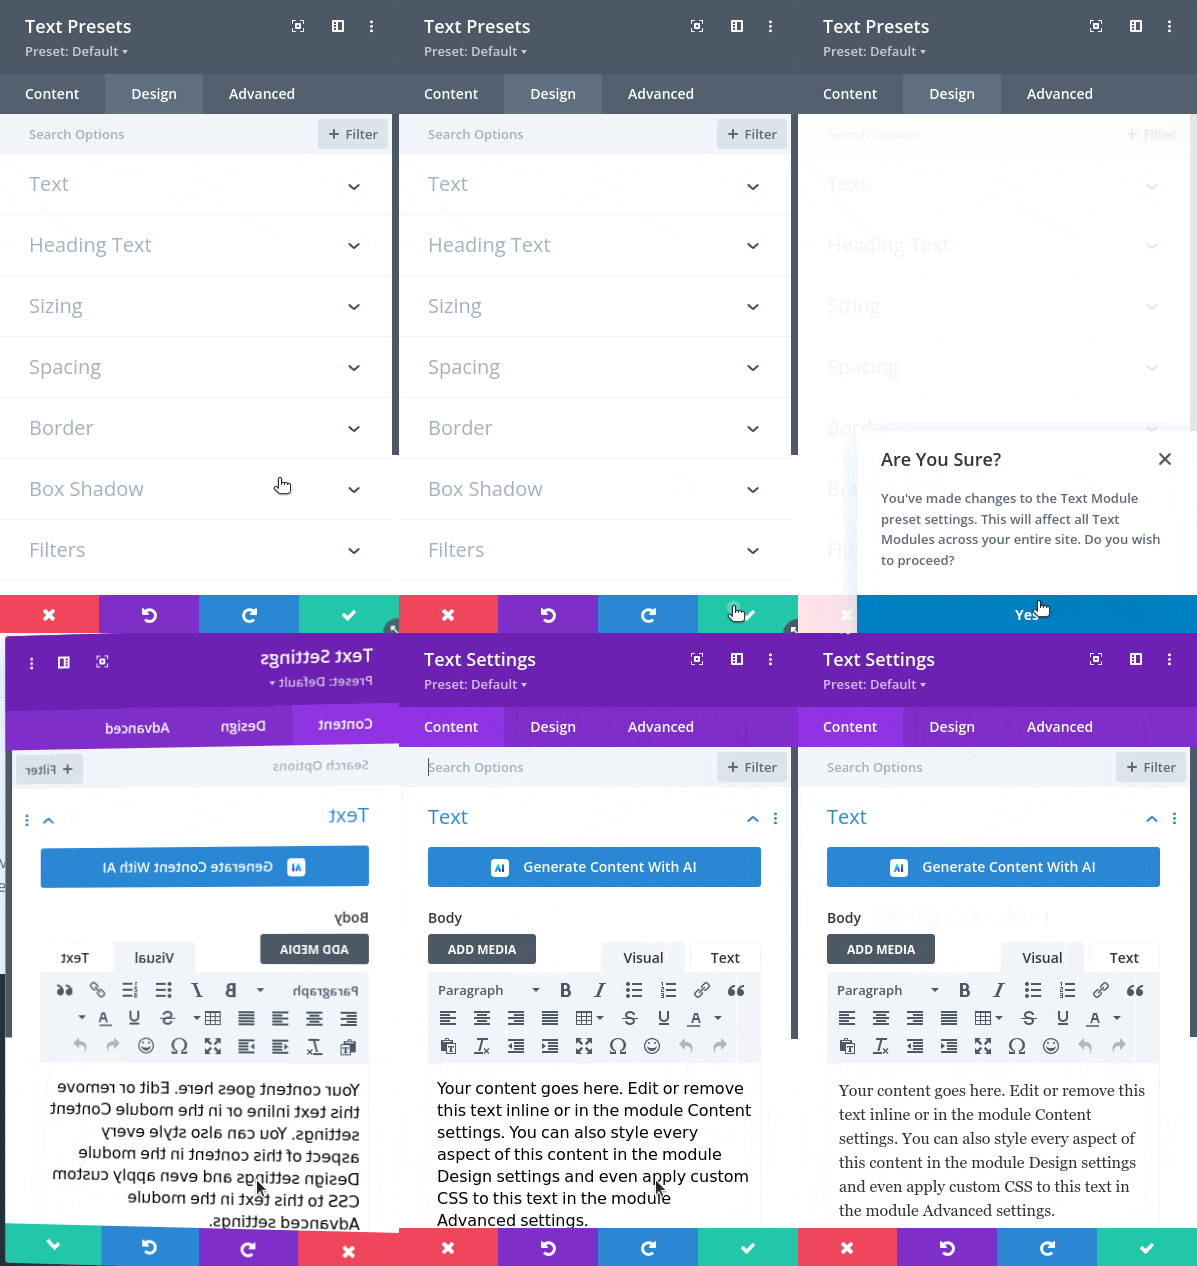
- Hit the
Saveicon and confirm your changes by clickingYes.

Voila! You’ve successfully updated the default (global) preset. While the modifications will apply to all existing Divi elements of the type you edited, any prior customizations to Divi’s default options remain unaffected. Your changes have essentially set a new default.
Creating a New Preset
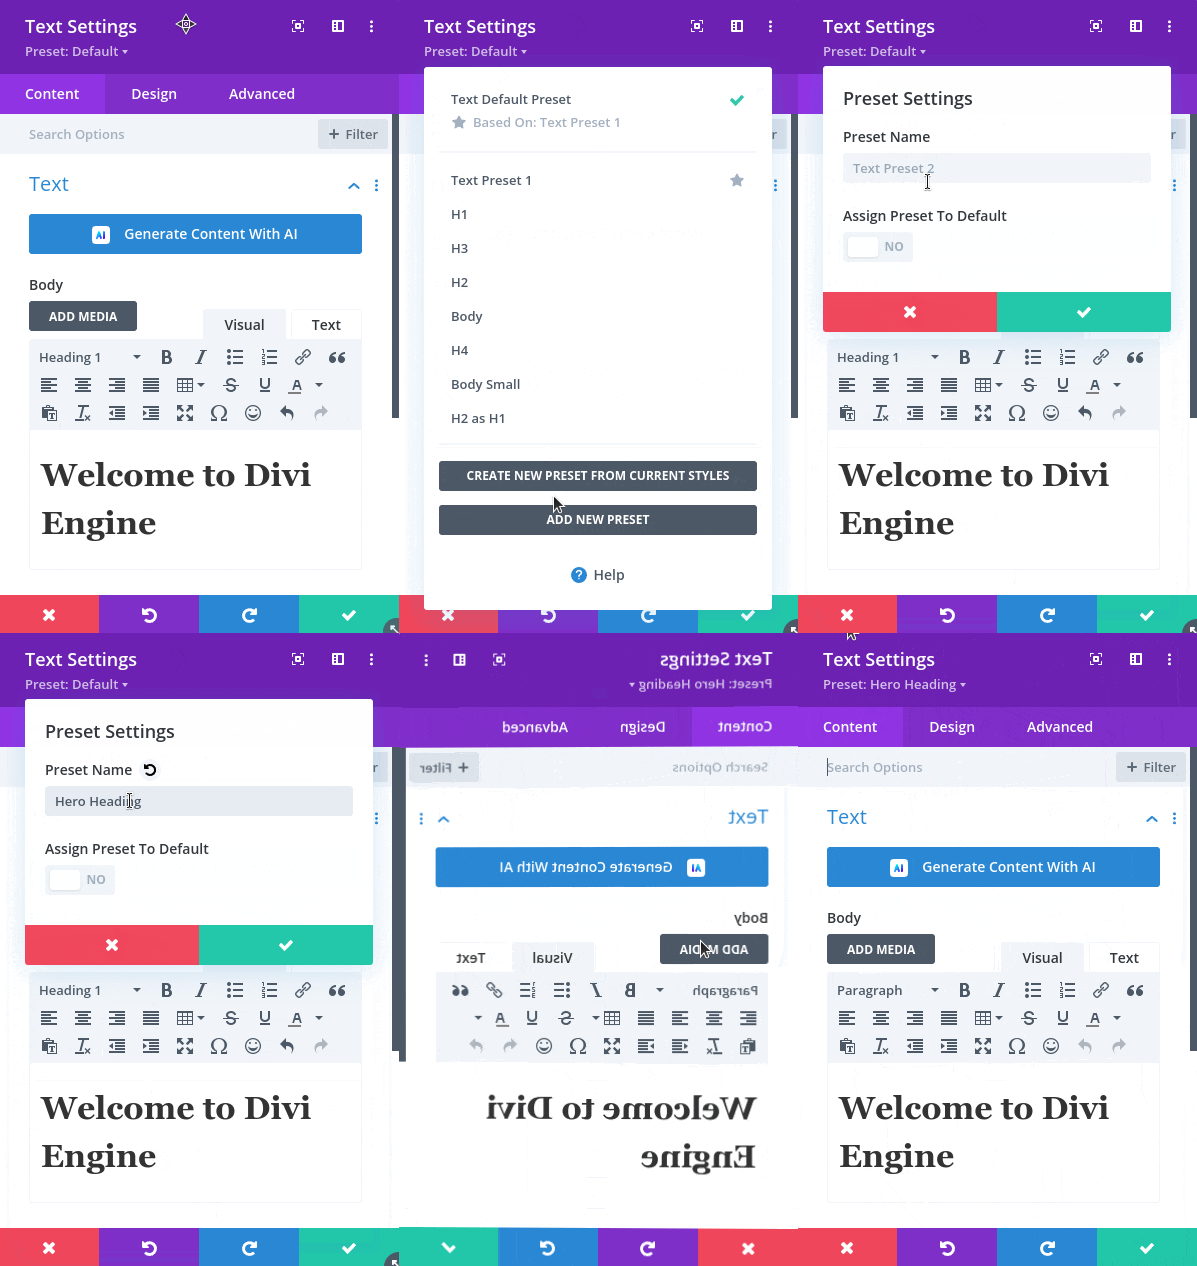
Construct a new preset for use when creating similar Divi elements (module, row, or section):
- While editing a Divi element, click on the
Presetdropdown. - In the ensuing menu, click on
ADD NEW PRESET. - Name your preset and save.

Once your new preset is created, the steps to edit it are identical to editing the default preset.
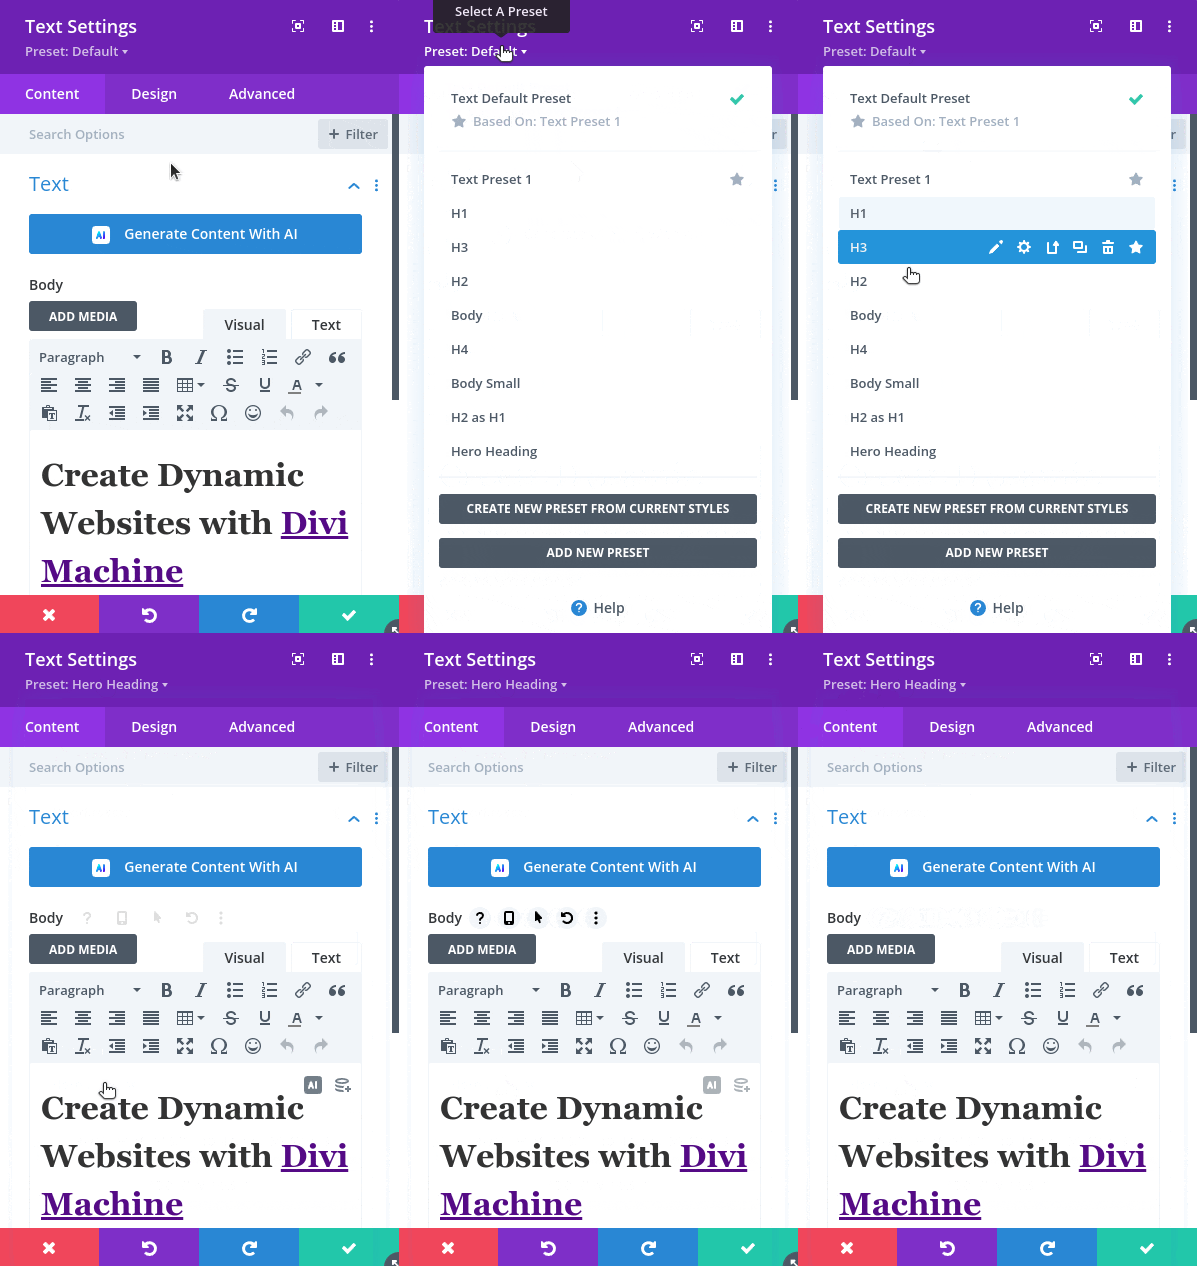
Selecting an Existing Preset
Re-utilizing existing presets to maintain a uniform style across your Divi Website is a great way to speed up the development of Divi websites.
- While editing a module, click on the
Presetdropdown to select and apply an existing preset.

Applying Customized Styles to the Active Preset
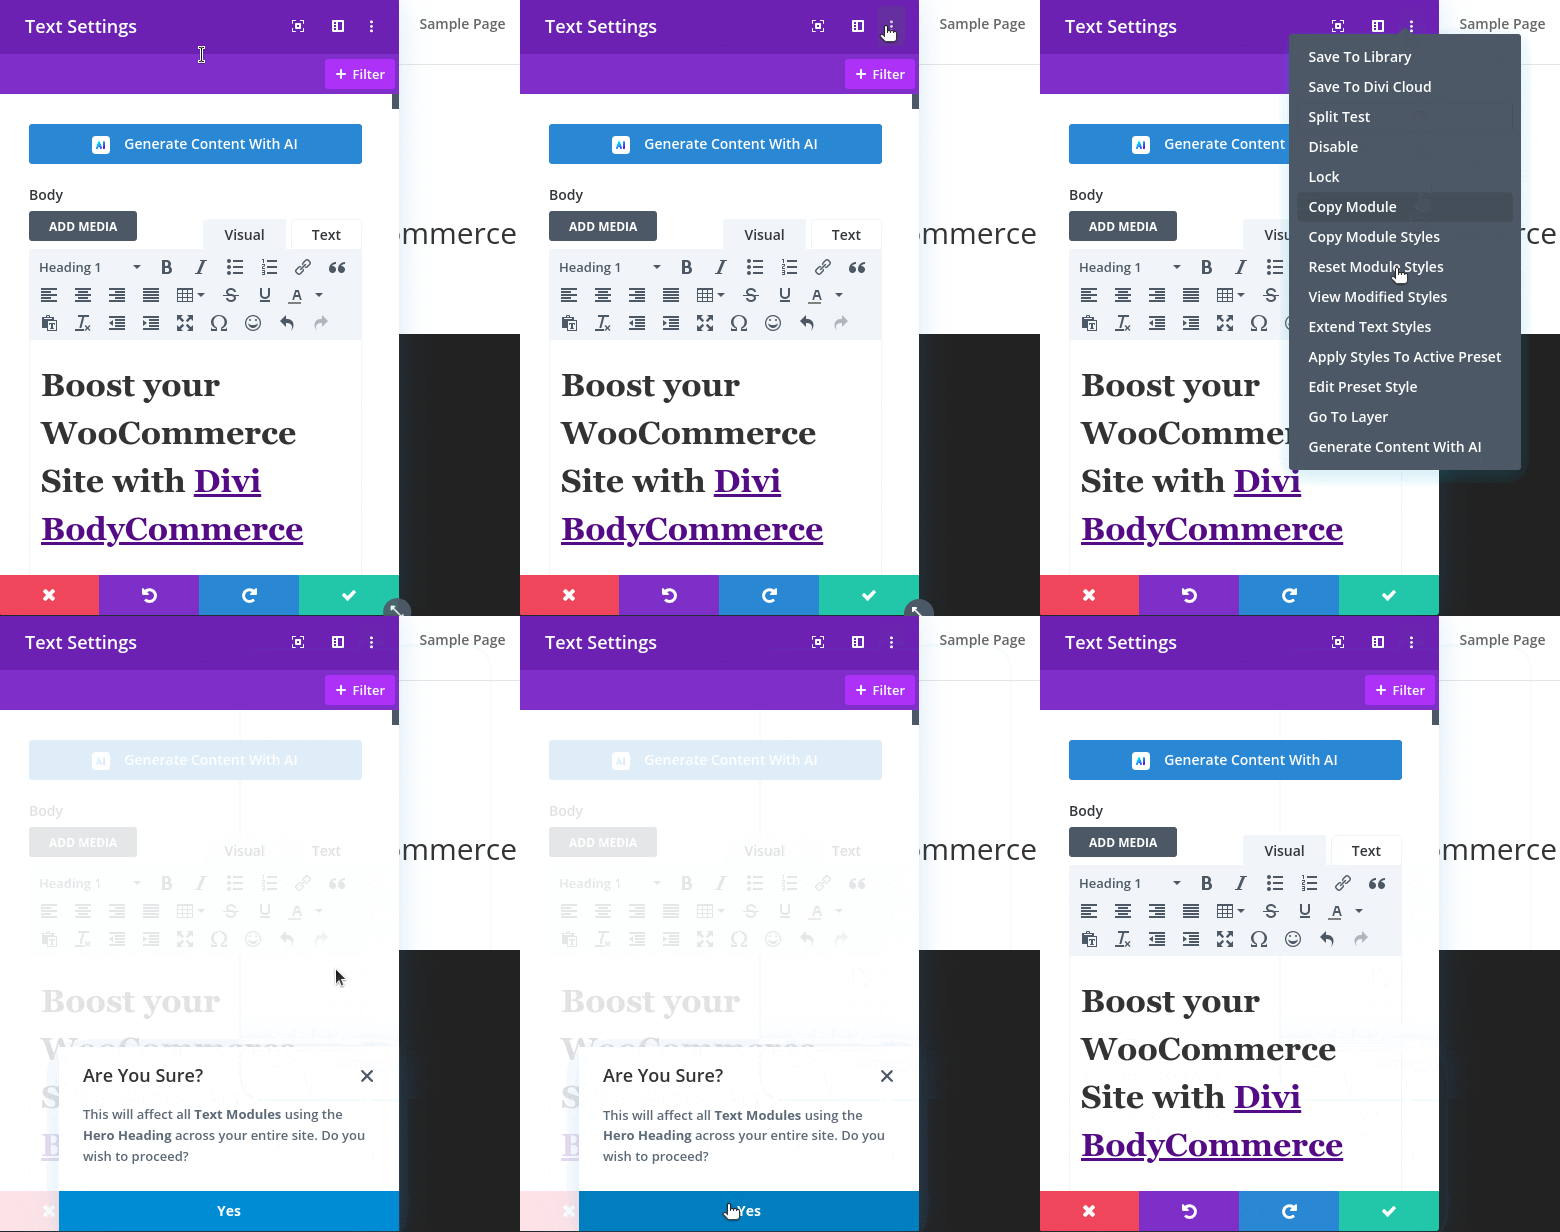
Got some style customizations already in place? Here’s how to apply them to the active preset:
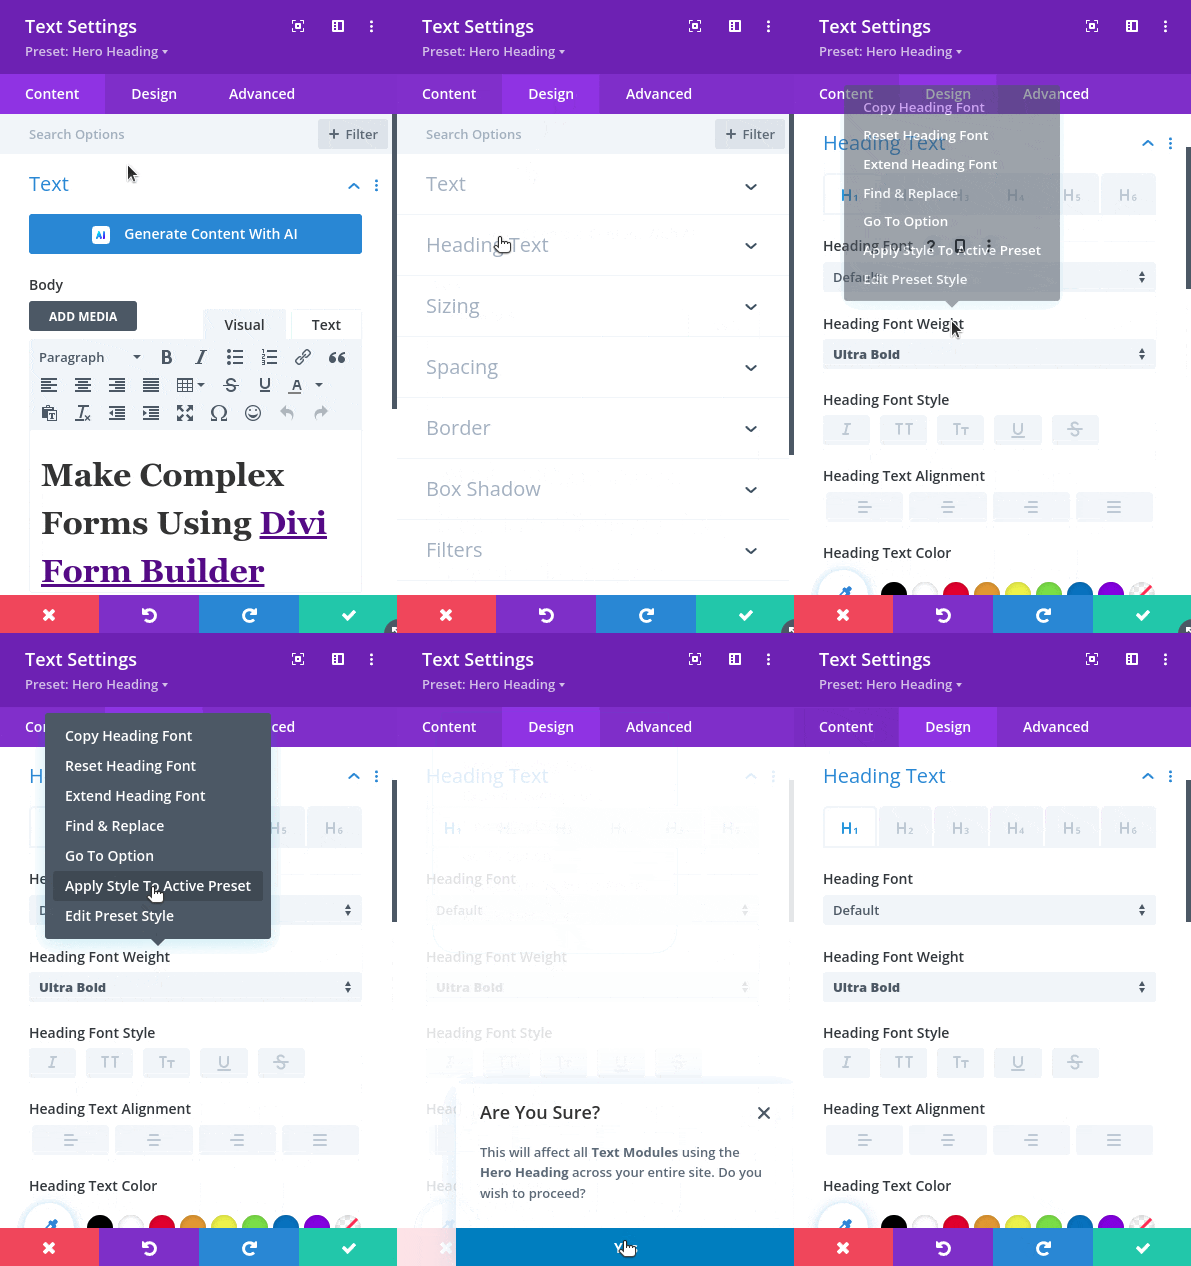
- Click on the three vertical dots at the top right corner of the settings window and select
Apply Styles To Active Preset. - Confirm your choice in the subsequent window.

Alternatively, right-click on any option while editing the Divi element and select Apply Styles To Active Preset.
How this boosts your Divi Skills
Embracing Divi presets is a savvy move for budding web designers. It empowers you to establish default styling, design once, and amend anytime. Creating new presets is also a boon for managing special styles that deviate from your defaults but need to be replicated across your site. Before this feature was introduced, defining defaults entailed writing lengthy CSS scripts. Thanks to presets, that’s no longer a necessity, saving you precious time and effort. In a nutshell, it’s a robust tool for every Divi web designer aiming to refine their craft and accelerate their workflow.
CONTRIBUTOR: Pavak P.
Other Installments













0 Comments